Showing posts with label icing. Show all posts

Tuesday, March 6, 2012

Cake Pops How-To

Recently, I was asked to make cake pops for a child's 6th birthday. Never having made cake pops before, I took on the request though I didn't make any promises for success. The procedure is pretty straightforward but it's a finicky process. A finicky process that I'd like to share with you.

To make the cake pops you will need: cake and icing of your choice, sticks for the cake pops, candy melts and sprinkles/decorations to decorate as desired

1. The first thing you'll need to do is bake a cake. I used a basic chocolate cake, and chocolate icing for the cake pops. 

2. Once the cake is cooled, crumble it up into a large bowl, and add a few cups of icing (you may want more depending on how much cake you have - you'll be able to judge an appropriate amount), combining the two thoroughly until the mixture can be shaped into balls.

3. Once you've reached the desired consistency, shape the mixture into balls, and position them on a tray, cookie sheet, or other flat surface that will fit in a fridge or freezer. I used a cookie sheet lined with parchment paper.

4. Allow the balls to cool in the refrigerator overnight or in the freezer for a couple hours until they are chilled through and hard.

5. Melt the candy in a microwave-safe bowl or over a double boiler. Dip the sticks in the melted candy and then insert them into the chilled cake balls. Allow the sticks to sit for a couple seconds so that the candy hardens.

6. Coat the cake pops in the melted candy. At this point, you'll want to decorate them (if you're choosing to do so). I used candies to make eyes, faces, etc. You'll want to be careful here. The candy melts, while still wet, will run off the cake pops to some extent and your decorations could run off. However, the candy melts harden quickly, so waiting too long will make it impossible to attach the decorations to the pops.

7. Once the cake pops are dressed to your liking, allow the candy melts to harden completely, and enjoy. While the candy melts were hardening, I used a strainer so that any candy that dripped off had something to drip into, and the holes in the strainer were a good size to hold the pops apart from each other while they were drying.

The cake pops turned out alright. They were not nearly as pretty as I would have liked, however there is something of a learning curve when it comes to getting them to look nice. Until I've mastered the art of decorating them though, I'm just going to say they're supposed to be alien cake pops. And now, you know how to make them too! 

Monday, February 13, 2012

Hello Kitty Cake

Hi there friends! I hope you all had a fantastic weekend/Valentine's Day (if you've already celebrated it). Maybe you tried out those DIY heart-shaped cupcakes (if so, how did they turn out?).

If your weekend was anything like mine though, it was a whirlwind and flew by without there being enough time. Last week, I had even less time than I did over the weekend, because I took on two cakes in addition to everything else.

The first of these cakes was a Hello Kitty cake that my aunt and uncle requested for my cousin's 5th birthday. It was pretty straight forward - use the Hello Kitty pan to bake the cake and then ice it.
This process went quite smoothly. I used a vanilla cake recipe from Baking With The Cake Boss, and my basic butter cream recipe that I've come to know by heart.

There weren't any problems with this cake (though it did take about 1.5 times longer to bake than the recipe indicated because of the depth of the pan) but I feel the need to let you all in on a secret.

Ready for it?

Using a 16 Star Tip to ice the entire cake takes forever. I honestly spent over two hours just piping the white onto the majority of the cake.

In the end though, I was pretty satisfied with the results. It's not too often (yet) that I get to say that so I'll call this cake a success. Also, though I didn't get a chance to try out the cake, I was told that the recipe was a hit!

Check back in a couple days to hear about my less successful cake encounter that also took place last week!

Thursday, February 9, 2012

Valentine's Day Red Velvet Cupcakes

Happy Valentine's Day to all the lovebirds reading this today! I wanted to share with you today some quick and easy heart-shaped cupcakes to celebrate Valentine's Day.

After seeing a photo on Pinterest, I improvised a method to do the same thing as there was no corresponding link to instructions. So, I've created a little how-to for you, based on how I accomplished these cupcakes, so that you can make something special for your special someone.

You will need:

  • Your favourite cake/cupcake batter, and icing
  • A regular muffin pan
  • Muffin pan liners
  • Marbles or glass rocks, or other heat-proof round objects
  • Sprinkles, candies, sugar dust, etc. to decorate
From what I could tell in the photo on Pinterest, they used marbles. I didn't have marbles so I improvised with decorative glass stones. I also used a Red Velvet cake recipe from Baking With The Cake Boss (I've still yet to watch his show), as well as a Cream Cheese Icing from the book. Once you've got your batter prepared, this is what you'll want to do:
  1. Line muffin pan with liners (I used Valentine's Day themed liners)
  2. Fill each liner with your cake batter (using something like an ice-cream scoop will help alleviate any mess and ensure that the cupcakes are roughly the same size)
  3. Using your index finger, push the liner towards the centre of the muffin hole
  4. Fill the resulting space with marbles or other objects to hold the liner in place (you'll want to stack a few on top of each other, so that the batter doesn't bake over top of the marble)
  5. Bake cupcakes according to recipe directions
  6. Let cupcakes cool, and remove from pan - be careful, the marbles may still be warm
  7. Allow cupcakes to cool completely and ice as desired
When icing my cupcakes, I chose to decorate them with red and white sugar sprinkles, heart-shaped candy sprinkles, and silver sugar dust. I used Valentine's Day themed cookie cutters on top of the cupcakes and filled the cookie cutter in with the dust (or sprinkles in some cases) to leave the decorations in the shapes of hearts, flowers, bells, etc. 
These were quick and easy, without the cost of purchasing a heart-shaped pan, or the need to elaborately decorate a cake! You get delicious results, and more time to spend with loved ones! 

On a side note - the Red Velvet cupcakes stayed nice and moist, and tasted pretty good, however the recipe only calls for 1tbsp of cocoa powder. I found that this left them a bit bland, as red velvet is supposed to have that cocoa taste. I'll be using my old recipe next time!

Tuesday, February 7, 2012

Peanut Butter Cupcakes and Butter Cream Roses

I'm going to be completely honest about a couple things:
1. I love peanut butter
2. I have no self-control when it comes to baked goods

Only the first point is relevant to this post, but the second is important because I just feel better admitting it. Its like a weight is lifted.

Moving along, what I wanted to talk about today was not only my absolute favourite cupcakes, but also butter cream roses.

I stumbled on a great video on YouTube, sort of by accident, and it was a pretty clear tutorial about how to pipe butter cream roses, something which, until this point, I hadn't even fathomed trying. The video made it look pretty easy though, and I decided I wanted to learn. This required cupcakes, because who needs icing roses with no cupcake? No one.

This brings me to the peanut butter cupcakes. My absolute favourite cupcakes. Without a doubt the best things of my life. So I thought I'd share the recipe with you, which I originally found on the Wilton website. To make the cupcakes, you'll need:

2 cups all-purpose flour
2 tsp baking powder
1/4 tsp salt
1 1/4 cups firmly packed brown sugar
6 tbsp butter, softened
3/4 cup peanut butter
2 eggs
1 tsp vanilla extract (the original recipe calls for clear vanilla, but I prefer pure vanilla extract, it has a nicer flavour)
1 cup milk

Preheat your oven to 350 degrees, and either line a muffin pan with cups or spray it with non-stick baking spray and set it aside. In a medium bowl, combine the flour, baking powder, and salt, and set it aside once they're combined. In a large bowl, cream the butter, brown sugar, and peanut butter. Once the mixture is smooth, add the eggs one at a time, followed by the vanilla extract. Next, alternately add the milk and the flour mixture until all of the ingredients are combined. Spoon the batter into the muffin cups, and bake for 20-25 minutes, checking that they're done (use a cake tester or a tooth pick, if it comes out clean they're ready!).

Once my cupcakes were ready, I used my new-found rose-making savvy to pipe butter cream roses. I used a chocolate butter cream icing because there is something irresistible about peanut butter and chocolate. Some of the roses were piped onto parchment paper squares on a flower nail, while I piped others directly onto the cupcakes. While they were by no means perfect, they turned out pretty well for a first attempt. Check out the video below and attempt these cupcakes and flowers yourself! 

Friday, February 3, 2012

Homemade Fondant Icing

A few weeks ago, I stumbled upon a photo of homemade fondant on Pinterest, and re-pinned the photo/link so that I could refer to it in the future. The future has arrived, my friends.

Until now I'd always been using store-bought fondant. I didn't have a clue what I was doing, and felt that it was best to stick with the pre-made stuff. Having said that, let me tell you that buying fondant is expensive. Especially for any fondant other than basic white. So I finally decided that I'd attempt to make my own, keeping in mind the link I'd found (click here to see it for yourself). I didn't have the web page open in front of me, but kept it in mind while making the fondant.


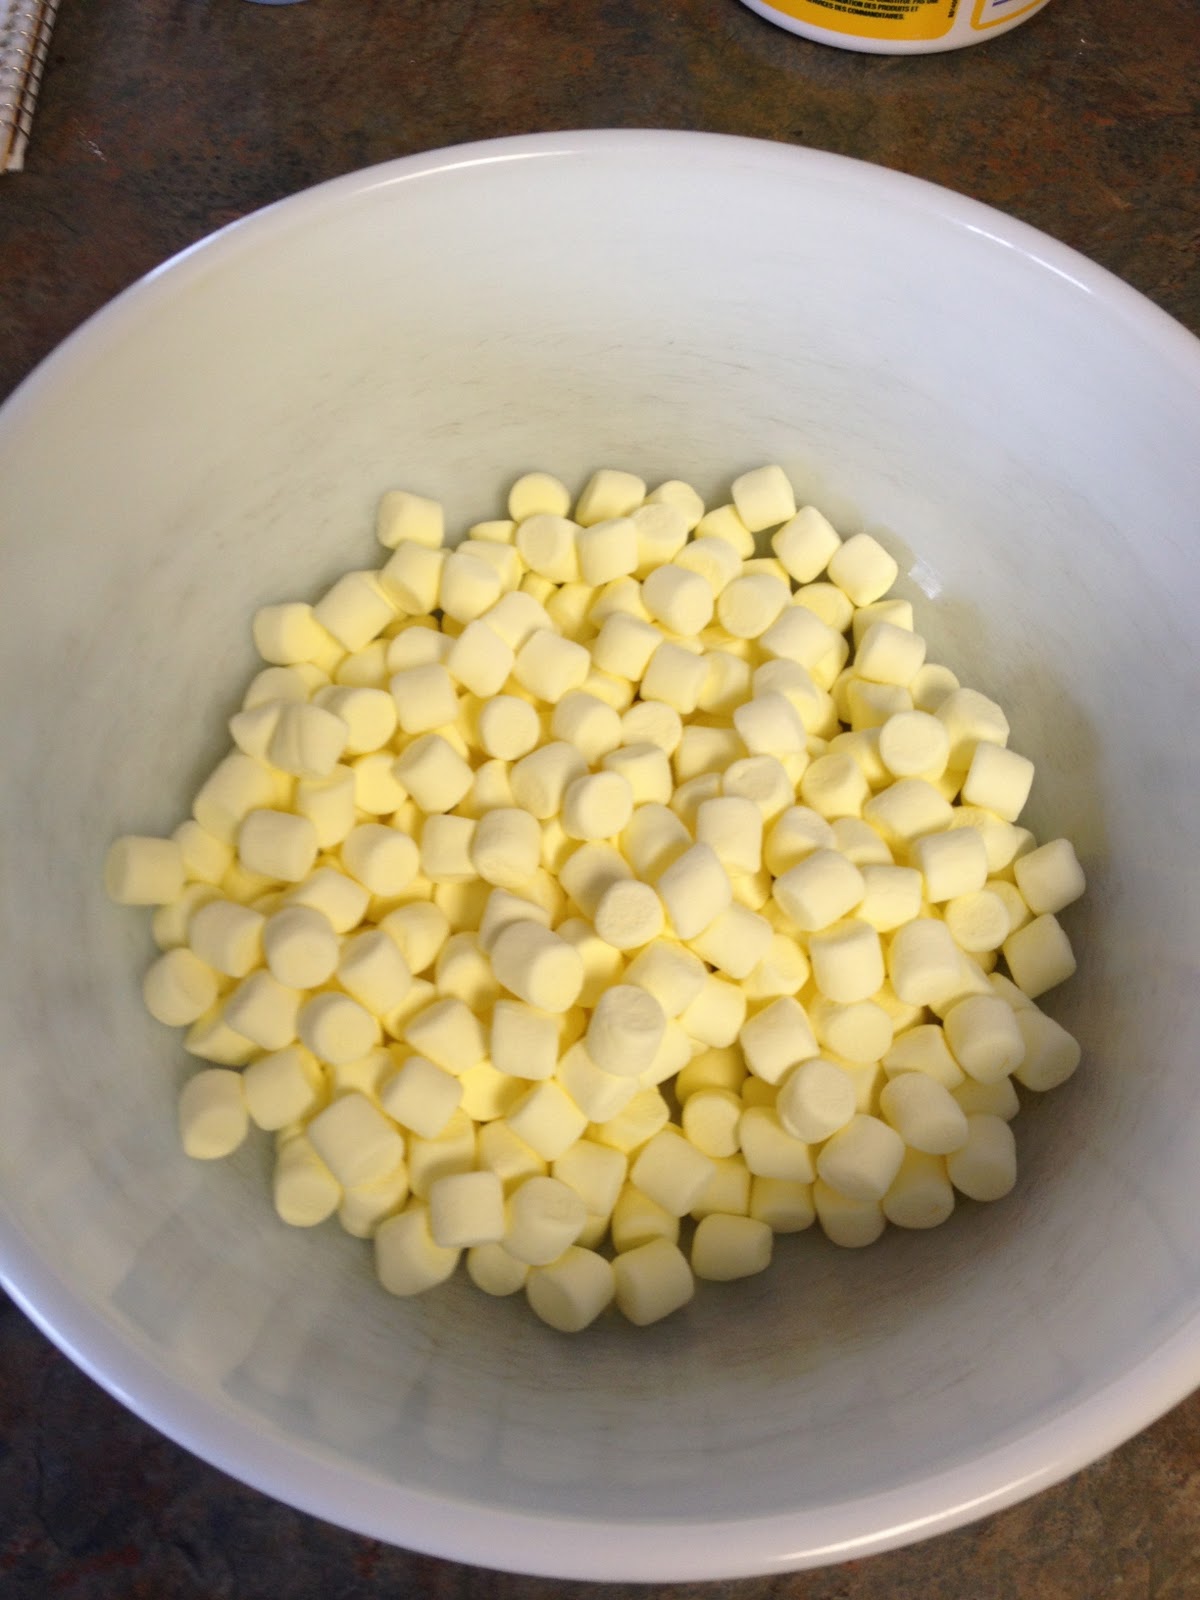
Like the instructions showed, I used multi-coloured marshmallows. I bought two bags and sorted through them to separate all of the colours, and set each group aside in its own Ziplock bag.


The first colour I used was the pink, and it didn't go nearly as smoothly as the green and yellow did - I ran out of icing sugar before I got to make the orange. Anyway, the instructions say to toss the marshmallows in a small amount of water. I forgot that step, and ended up with a sticky mess that was a nightmare to work with. The marshmallow goo got stuck to the spoon, to the bowl, to the counter, the cutting board, my hands, everything you could imagine. The hassle of getting the sticky gunk off everything was nearly enough to put me off making marshmallow fondant again.

Rather than give up right away, however, I checked back to that link, via Pinterest, and found that I had forgotten one tiny, simple step. I decided to try again with the yellow marshmallows and found that it worked much better. So, the key is to toss those little marshmallows with water! It made the whole process so much smoother, and it actually ended up being pretty simple. By the time I'd moved on to the green marshmallows, I felt like a pro.

Now, I don't really like the taste of fondant, though it looks nice (thank heavens for the real icing layer that's found under fondant), but the marshmallow stuff tastes worlds better than the store bought kind, and its so much nicer on the wallet!

Tuesday, January 17, 2012

Birthday-Bow Cake

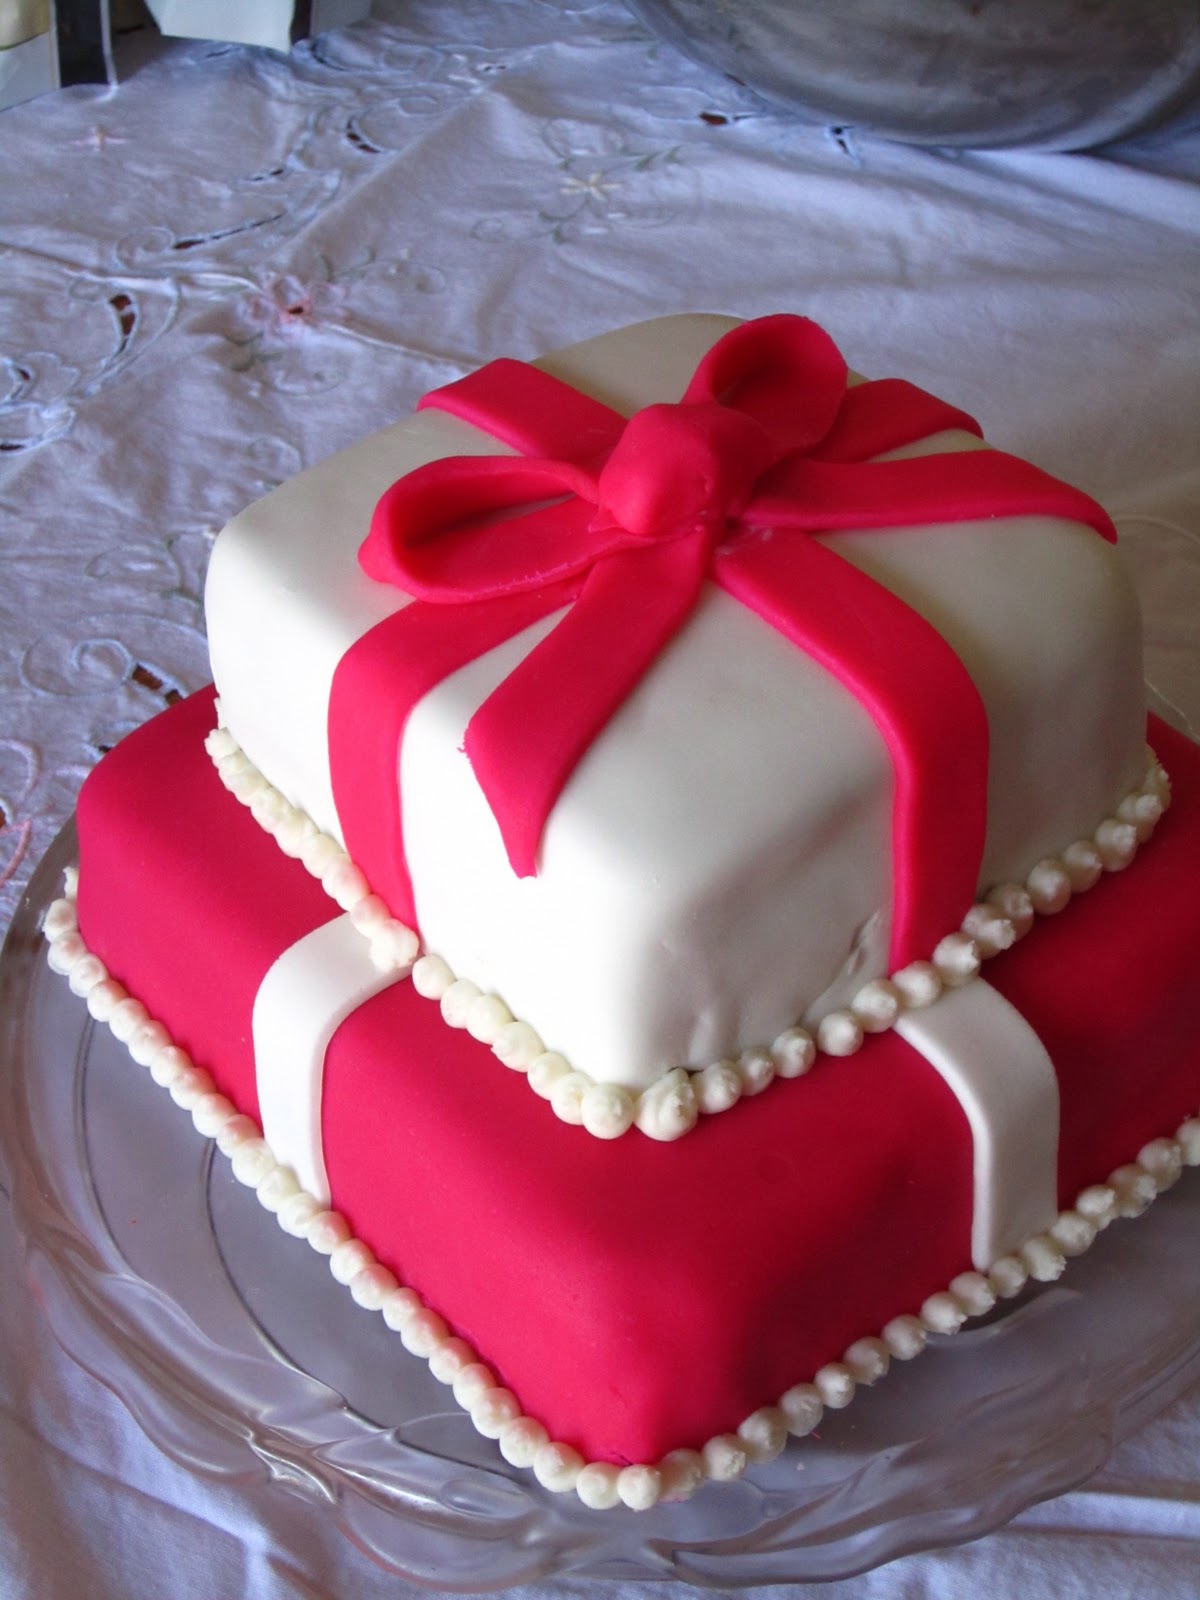
My mom's 50th birthday cake is the reason I started teaching myself cake decorating. I had only used fondant once previously,  and this cake was quite different, and  it was a problem from start to finish.

The cake had to feed 30+ people. It had two 9" square layers (one chocolate, one vanilla), and then two 6" square layers. The layers were separated with butter cream icing, and the cake as a whole was covered with chocolate buttercream. Baking went smoothly but problems came with the icing. First, the chocolate butter cream was too thin to go on properly and just ran everywhere. Not cool. I added icing sugar to the butter cream to thicken it up and things went alright after that.

Next was the fondant. The 9" cake needed a lot of fondant rolled out to cover it.  I used a pink fondant for this portion of the cake. It took several tries to get it rolled out to a size that would cover the whole cake. I'll be buying a roll-and-cut mat before my next venture of this size, that's for sure. Once I finally had the cake covered, trimming the fondant became pretty difficult. The corners were awful to trim and to get the fondant to lay properly.  I managed to muddle my way through the bottom cake without too much issue.
The smaller 6" cake was more complicated. I used a basic white fondant for this portion and again had a hard time with the corners. I wasn't as lucky as I was with the pink fondant, and ended up with a crack near one corner of the cake. Not paying attention, I later positioned the bow so that this would be on the front of the cake. Oops.

Finally, I had intended to make a bow that would have looked something like this. However, it was too humid and the fondant wouldn't harden enough, and the bows collapsed. The ribbons that were around the cake were already in place and attached to the cake, leaving me in quite a pickle because I didn't have much pink fondant left and I needed something quick.

I used some of the scraps that I had left over from the ribbons I'd made to go around the cake (made in no-time with a ribbon cutter and embosser). I hastily formed one piece of the ribbon into a large ball, and created loops that could lay on either side to resemble a more traditional bow.


Once we brought the cake out to my mom, the candles dripped wax all over the place, which took away from the appearance but helped to draw attention away from all the problems in terms of the bow and the cracked fondant. People liked the cake, but it went down in my books as a failure. I'll master that bow one day though, if it's the last thing I do.

Share This!